安装了WP Fastest Cache缓存插件,如果配置不当…
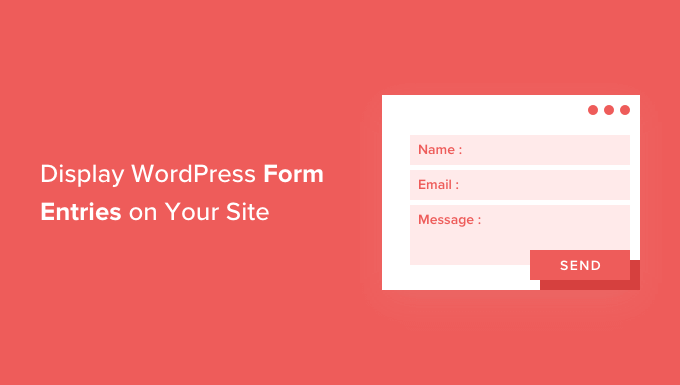
您想在网站前端显示您的 WordPress 表单条目吗?
在前端显示表单条目允许您向访问者显示重要信息。您可以使用它来显示正面评价、创建目录、显示活动日历等。
在本文中,我们将向您展示如何在您的网站上显示 WordPress 表单条目。
为什么要在前端显示 WordPress 表单条目?
表单非常适合与访问者保持联系、获取反馈和建议、帮助用户解决问题等等。在某些情况下,在您的WordPress 网站上为访问者显示表单条目可能会有所帮助。
例如,您可以显示用户通过在线表单提交的推荐和产品评论。通过这种方式,您可以利用社交证明来建立品牌信任并提高转化率。
您还可以显示表单条目以创建业务目录、在日历上显示用户提交的事件、显示统计数据以及显示通过您网站上的在线表单收集的其他重要信息。
但是,默认情况下,当用户在您的 WordPress 网站上提交表单时,他们的条目是保密的。只有WordPress 管理员和其他有权限的用户可以查看表单条目。
让我们看看如何使用 Formidable Forms 和 WPForms 在 WordPress 网站的前端显示表单条目。您可以单击下面的链接跳转到您喜欢的部分。
使用强大的表单显示 WordPress 表单条目
在 WordPress 中显示表单条目的最简单方法是使用强大的表单。它是一个流行的WordPress 联系表单插件,并提供了一个具有许多自定义功能的一体化表单构建器。
您可以创建各种表格,如调查、测验、付款表格,以及高级表格,如活动日历、目录和计算器。
首先,您需要在您的站点上安装并激活强大的表单插件。如果您需要帮助,请参阅我们的关于如何安装 WordPress 插件的指南。
对于本教程,我们将使用Formidable Forms Pro版本,因为它包含 Visual Views 插件。
激活后,您可以转到强大»表单并单击顶部的“+添加新”按钮。
之后,将出现一个弹出窗口,要求您选择表单类型,例如联系我们表单、用户注册表单、调查表等。
继续并选择您喜欢的表单类型。为了本教程的目的,我们将创建一个联系表单来收集用户的推荐信。
接下来,您需要输入表单名称和描述。
完成后,只需单击“创建”按钮。
现在您可以使用表单生成器来自定义您的表单。
Formidable 提供了一个超级易于使用的拖放构建器。只需从左侧的选项中选择要添加到表单的任何表单字段,然后将它们放入表单模板中。
自定义您的联系表格后,继续将其嵌入您网站的任何位置。
该插件提供了多个选项来添加您的表单。最简单的方法是单击顶部表单构建器中的“嵌入”按钮,然后选择现有页面或创建新页面以添加表单。
或者,您也可以在WordPress 内容编辑器中使用强大的表单块或短代码块来嵌入您的表单。
接下来,您可以为页面命名并进行预览。
当您对其外观感到满意时,请继续发布您的页面。
在您的表单生效并开始获取条目后,您需要在 Formidable Forms 中安装并激活 Visual Views 插件。
为此,只需从您的 WordPress 仪表板转到强大的 » 附加组件。接下来,向下滚动到“Visual Views”插件并单击“安装”按钮。
插件激活后,您可以从 WordPress 仪表板转到强大的 » 视图。
之后,只需单击顶部的“+ 添加新”按钮。
接下来,将出现一个弹出窗口,您需要在其中选择视图类型。该插件提供了您可以使用的网格、表格、日历和经典视图。
在本教程中,我们将使用“网格”视图来显示表单条目。
之后,您必须为视图选择数据源。
继续并单击“使用表单中的条目”下拉菜单并选择您的表单。还有一个输入视图名称的选项。
选择数据源后,只需单击“创建视图”按钮。
这将以强大的形式启动视图构建器。
要开始,请继续并单击“布局生成器”按钮。
接下来,您需要选择一个布局来显示您的表单条目。
只需从顶部的给定选项中选择一个布局。您可以添加多个布局来显示表单条目。
选择布局后,继续并单击“保存布局”按钮。
接下来,您可以通过单击“+”按钮将内容添加到视图构建器。有一些选项可以自定义表单条目的布局并在表单条目之前和之后添加内容。
该插件还在左侧的“网格样式设置”面板下提供了更改排版、背景颜色、边框等的选项。
您还将在“视图名称”字段下看到一个简码,在您的网站上显示表单条目时需要该简码。
网格样式设置面板中有更多高级选项。在高级设置中,您可以限制条目数、页面大小等。
自定义视图后,不要忘记单击顶部的“更新”按钮。
接下来,您需要在 WordPress 网站上显示表单条目。为此,请复制视图名称下给出的简码。
短代码将如下所示:
1[display-frm-data id=2410]
之后,转到您想要显示表单条目的任何帖子或页面。进入内容编辑器后,只需添加一个“短代码”块。
现在,在简码块中输入您之前复制的简码。
之后,您可以预览页面并发布它。
您现在可以访问您的网站以查看正在运行的表单条目。
这是它们在我们的演示网站上的样子:
使用 WPForms 显示 WordPress 表单条目
在 WordPress 网站前端显示表单条目的另一种方法是通过WPForms。但是,此方法需要编辑代码,建议具有编码知识的高级用户使用。
WPForms 是WordPress 的最佳联系表单插件,可让您使用拖放表单构建器创建不同类型的表单。
请注意,如果您想在 WordPress 仪表板中查看表单条目,则需要WPForms Pro版本。还有一个您可以免费使用的WPForms Lite版本,它会发送所有表单条目的电子邮件通知。
首先,您需要安装并激活 WPForms 插件。有关更多详细信息,请参阅我们的关于如何安装 WordPress 插件的指南。
接下来,您将需要使用 WPForms 创建一个在线表单。您可以查看我们的分步指南,了解如何在 WordPress 中创建联系表单。
开始获取表单条目后,您需要将以下代码输入到主题的 functions.php 文件或特定于站点的插件中。请参阅我们的指南,了解如何在 WordPress 中轻松添加自定义代码以获取更多信息。
/** * Custom shortcode to display WPForms form entries in table view. * * Basic usage: [wpforms_entries_table id="FORMID"]. * * Possible shortcode attributes: * id (required) Form ID of which to show entries. * user User ID, or "current" to default to current logged in user. * fields Comma separated list of form field IDs. * number Number of entries to show, defaults to 30. * * @link https://wpforms.com/developers/how-to-display-form-entries/ * * Realtime counts could be delayed due to any caching setup on the site * * @param array $atts Shortcode attributes. * * @return string */ functionwpf_entries_table( $atts) { // Pull ID shortcode attributes. $atts= shortcode_atts( [ 'id' => '', 'user' => '', 'fields'=> '', 'number'=> '', 'type'=> 'all'// all, unread, read, or starred. ], $atts ); // Check for an ID attribute (required) and that WPForms is in fact // installed and activated. if( empty( $atts['id'] ) || ! function_exists( 'wpforms') ) { return; } // Get the form, from the ID provided in the shortcode. $form= wpforms()->form->get( absint( $atts['id'] ) ); // If the form doesn't exists, abort. if( empty( $form) ) { return; } // Pull and format the form data out of the form object. $form_data= ! empty( $form->post_content ) ? wpforms_decode( $form->post_content ) : ''; // Check to see if we are showing all allowed fields, or only specific ones. $form_field_ids= isset( $atts['fields'] ) && $atts['fields'] !== ''? explode( ',', str_replace( ' ', '', $atts['fields'] ) ) : []; // Setup the form fields. if( empty( $form_field_ids) ) { $form_fields= $form_data['fields']; } else{ $form_fields= []; foreach( $form_field_idsas$field_id) { if( isset( $form_data['fields'][ $field_id] ) ) { $form_fields[ $field_id] = $form_data['fields'][ $field_id]; } } } if( empty( $form_fields) ) { return; } // Here we define what the types of form fields we do NOT want to include, // instead they should be ignored entirely. $form_fields_disallow= apply_filters( 'wpforms_frontend_entries_table_disallow', [ 'divider', 'html', 'pagebreak', 'captcha'] ); // Loop through all form fields and remove any field types not allowed. foreach( $form_fieldsas$field_id=> $form_field) { if( in_array( $form_field['type'], $form_fields_disallow, true ) ) { unset( $form_fields[ $field_id] ); } } $entries_args= [ 'form_id'=> absint( $atts['id'] ), ]; // Narrow entries by user if user_id shortcode attribute was used. if( ! empty( $atts['user'] ) ) { if( $atts['user'] === 'current'&& is_user_logged_in() ) { $entries_args['user_id'] = get_current_user_id(); } else{ $entries_args['user_id'] = absint( $atts['user'] ); } } // Number of entries to show. If empty, defaults to 30. if( ! empty( $atts['number'] ) ) { $entries_args['number'] = absint( $atts['number'] ); } // Filter the type of entries all, unread, read, or starred if( $atts['type'] === 'unread') { $entries_args['viewed'] = '0'; } elseif( $atts['type'] === 'read') { $entries_args['viewed'] = '1'; } elseif( $atts['type'] === 'starred') { $entries_args['starred'] = '1'; } // Get all entries for the form, according to arguments defined. // There are many options available to query entries. To see more, check out // the get_entries() function inside class-entry.php (https://a.cl.ly/bLuGnkGx). $entries= wpforms()->entry->get_entries( $entries_args); if( empty( $entries) ) { return'<p>No entries found.</p>'; } ob_start(); echo'<table class="wpforms-frontend-entries">'; echo'<thead><tr>'; // Loop through the form data so we can output form field names in // the table header. foreach( $form_fieldsas$form_field) { // Output the form field name/label. echo'<th>'; echoesc_html( sanitize_text_field( $form_field['label'] ) ); echo'</th>'; } echo'</tr></thead>'; echo'<tbody>'; // Now, loop through all the form entries. foreach( $entriesas$entry) { echo'<tr>'; // Entry field values are in JSON, so we need to decode. $entry_fields= json_decode( $entry->fields, true ); foreach( $form_fieldsas$form_field) { echo'<td>'; foreach( $entry_fieldsas$entry_field) { if( absint( $entry_field['id'] ) === absint( $form_field['id'] ) ) { echoapply_filters( 'wpforms_html_field_value', wp_strip_all_tags( $entry_field['value'] ), $entry_field, $form_data, 'entry-frontend-table'); break; } } echo'</td>'; } echo'</tr>'; } echo'</tbody>'; echo'</table>'; $output= ob_get_clean(); return$output;}add_shortcode( 'wpforms_entries_table', 'wpf_entries_table');
将自定义代码添加到您的网站后,您需要在任何页面或帖子中输入以下短代码以显示表单条目。
[wpforms_entries_table id="FORMID"]
只需将 FORMID 替换为您的表单 ID。
您可以通过转到WPForms » All Forms然后查看 Shortcode 列来找到表单 ID。
要添加简码,只需创建一个新页面或编辑现有页面。
接下来,继续添加一个“短代码”块。
添加块后,只需输入您的简码。
现在预览您的 WordPress 页面并单击顶部的“发布”按钮。
以下是我们表单条目在前端的预览:
您可以根据需要使用自定义 CSS 样式进一步自定义显示。
我们希望本文能帮助您了解如何在您的网站上显示 WordPress 表单条目。您可能还想查看我们关于如何创建自定义 WordPress 主题的指南,或者我们对小型企业最佳实时聊天软件的专家比较。
相关档案